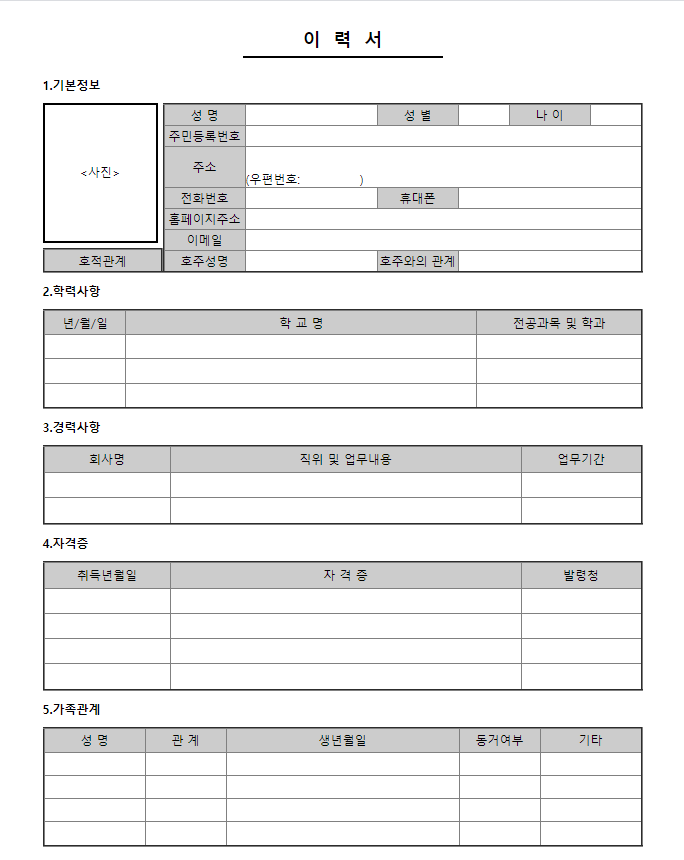
인터넷에 존재하는 이력서 폼을 똑같이 HTML로 만들기
나는 아래 이력서 양식과 똑같이 만드려고 한다.
http://www.sampledocu.com/resume/408
워드 상세 이력서 양식 (호적관계포함) - DOC
서식 확장자 안내 DOC : MS오피스 워드문서 프로그램 또는 MS워드뷰어 / 네이버 구글 오피스 문서 편집기 서식 이용안내 기본인적사항과 학력사항,경력사항,가족관계,자격증을 입력할수 있는 워드
sampledocu.com
숙제 제출 코드 >>
더보기
<!DOCTYPE html>
<html>
<head>
<meta charset="UTF-8">
<title>Insert title here</title>
<style type="text/css">
* {
margin: 0; padding: 0;
}
body {
font-size: 12px;
font-family: "맑은 고딕", 나눔고딕, 돋움, sans-serif;
}
.resume {
margin: 20px auto;
width: 600px;
}
.title {
padding: 10px;
text-align: center;
padding-bottom: 0;
}
.table {
margin: 0px auto;
}
.info .td, .info .tr {
text-align: center;
}
.contents {
text-align: left;
padding: 10px 0px;
}
.name, .gender, .age {
width: 80px;
text-align: center;
background: #ccc;
}
</style>
</head>
<body>
<div class="resume" >
<h2 class="title">이 력 서</h2>
<table style="width: 200px; border-top: 2px solid #000; margin: 5px auto;">
<tr >
<td></td>
</tr>
</table>
<table class="info" style="width: 115px; height: 140px; border: 2px solid #000; float: left;">
<caption class="contents"><b>1.기본정보</b></caption>
<tr>
<td align="center"><사진></td>
<tr>
</table>
<table border="2" style="border-collapse: collapse; height: 170px; width: 480px; float: right;">
<caption class="contents"> </caption>
<tr>
<td class="name">성 명</td>
<td></td>
<td class="gender">성 별</td>
<td style="width: 50px;"></td>
<td class="age">나 이</td>
<td style="width: 50px;"></td>
</tr>
<tr>
<td style=" width: 80px; text-align: center; background: #ccc;">주민등록번호</td>
<td colspan="5"></td>
</tr>
<tr>
<td style=" height:40px; width: 80px; text-align: center; background: #ccc;">주소</td>
<td colspan="5" valign="bottom">(우편번호: )</td>
</tr>
<tr>
<td style=" width: 80px; text-align: center; background: #ccc;">전화번호</td>
<td></td>
<td style=" width: 80px; text-align: center; background: #ccc;">휴대폰</td>
<td colspan="3"></td>
</tr>
<tr>
<td style=" width: 80px; text-align: center; background: #ccc;">홈페이지주소</td>
<td colspan="5"></td>
</tr>
<tr>
<td style=" width: 80px; text-align: center; background: #ccc;">이메일</td>
<td colspan="5"></td>
</tr>
<tr>
<td style=" width: 80px; text-align: center; background: #ccc;">호주성명</td>
<td></td>
<td style=" width: 80px; text-align: center; background: #ccc;">호주와의 관계</td>
<td colspan="4"></td>
</tr>
</table>
<table border="2" style="margin-top: 5px; border-collapse:collapse; float: right; width: 120px;">
<tr>
<td style=" height: 21px; text-align: center; background: #ccc;">호적관계</td>
</tr>
</table>
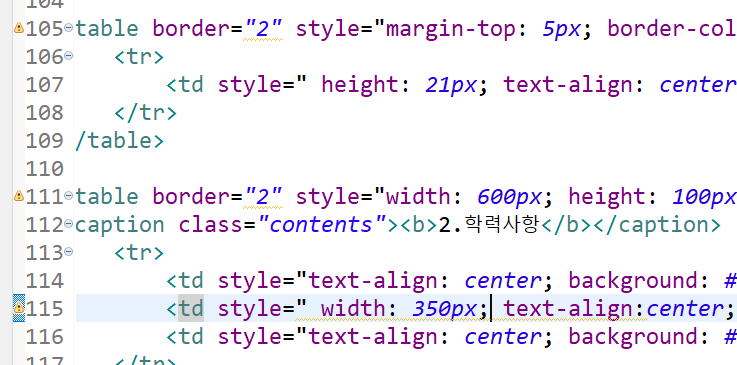
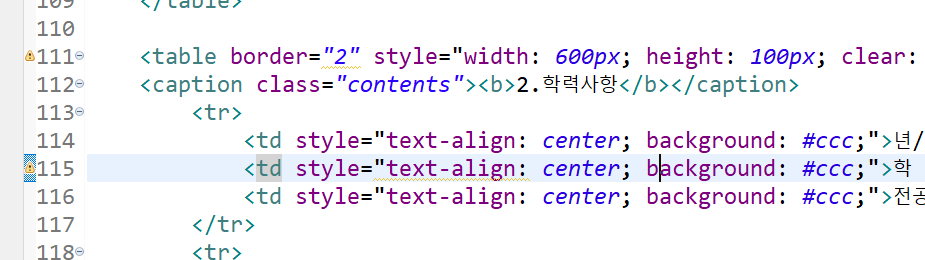
<table border="2" style="width: 600px; height: 100px; clear: both; border-collapse: collapse;">
<caption class="contents"><b>2.학력사항</b></caption>
<tr>
<td style="text-align: center; background: #ccc;">년/월/일</td>
<td style="width: 350px; text-align: center; background: #ccc;">학 교 명</td>
<td style="text-align: center; background: #ccc;">전공과목 및 학과</td>
</tr>
<tr>
<td> </td>
<td></td>
<td></td>
</tr>
<tr>
<td> </td>
<td></td>
<td></td>
</tr>
<tr>
<td> </td>
<td></td>
<td></td>
</tr>
</table>
<table border="2" style="width: 600px; height: 80px; clear: both; border-collapse: collapse;">
<caption class="contents"><b>3.경력사항</b></caption>
<tr>
<td style="width: 125px;text-align: center; background: #ccc;">회사명</td>
<td style="width: 350px;text-align: center; background: #ccc;">직위 및 업무내용</td>
<td style="text-align: center; background: #ccc;">업무기간</td>
</tr>
<tr>
<td> </td>
<td></td>
<td></td>
</tr>
<tr>
<td> </td>
<td></td>
<td></td>
</tr>
</table>
<table border="2" style="width: 600px; height: 130px;clear: both; border-collapse: collapse;">
<caption class="contents"><b>4.자격증</b></caption>
<tr>
<td style="width: 125px;text-align: center; background: #ccc;">취득년월일</td>
<td style="width: 350px;text-align: center; background: #ccc;">자 격 증</td>
<td style="text-align: center; background: #ccc;">발령청</td>
</tr>
<tr>
<td> </td>
<td></td>
<td></td>
</tr>
<tr>
<td> </td>
<td></td>
<td></td>
</tr>
<tr>
<td> </td>
<td></td>
<td></td>
</tr>
<tr>
<td> </td>
<td></td>
<td></td>
</tr>
</table>
<table border="2" style="width: 600px; height: 120px; clear: both; border-collapse: collapse;">
<caption class="contents"><b>5.가족관계</b></caption>
<tr>
<td style="width: 100px;text-align: center; background: #ccc;">성 명</td>
<td style="width: 80px;text-align: center; background: #ccc;">관 계</td>
<td style="text-align: center; background: #ccc;">생년월일</td>
<td style="width: 80px;text-align: center; background: #ccc;">동거여부</td>
<td style="width: 100px;text-align: center; background: #ccc;">기타</td>
</tr>
<tr>
<td> </td>
<td></td>
<td></td>
<td></td>
<td></td>
</tr>
<tr>
<td> </td>
<td></td>
<td></td>
<td></td>
<td></td>
</tr>
<tr>
<td> </td>
<td></td>
<td></td>
<td></td>
<td></td>
</tr>
<tr>
<td> </td>
<td></td>
<td></td>
<td></td>
<td></td>
</tr>
</table>
</div>
</body>
</html>잘 나오기는 하는데 코드에 잘못된 부분이 있는지 자꾸 느낌표가 떠있다.
뭐가 잘못된건지 모르겠다 짜증 ㅠㅠ
위랑 같게 해도 느낌표가 자꾸 나오고 화딱지난당
Style을 head 에 태그나 class명으로 주고 싶은데 잘 안돼서 자꾸 인라인으로 style을 주게된다ㅠㅠ..
'쌍용강북교육센터 > 9월' 카테고리의 다른 글
| 0916~0917_CSS : Cascading Style Sheets(CSS) (0) | 2021.09.22 |
|---|---|
| 0915_HTML : table, ul li 사용한 회원가입 폼 만들기 숙제 (0) | 2021.09.15 |
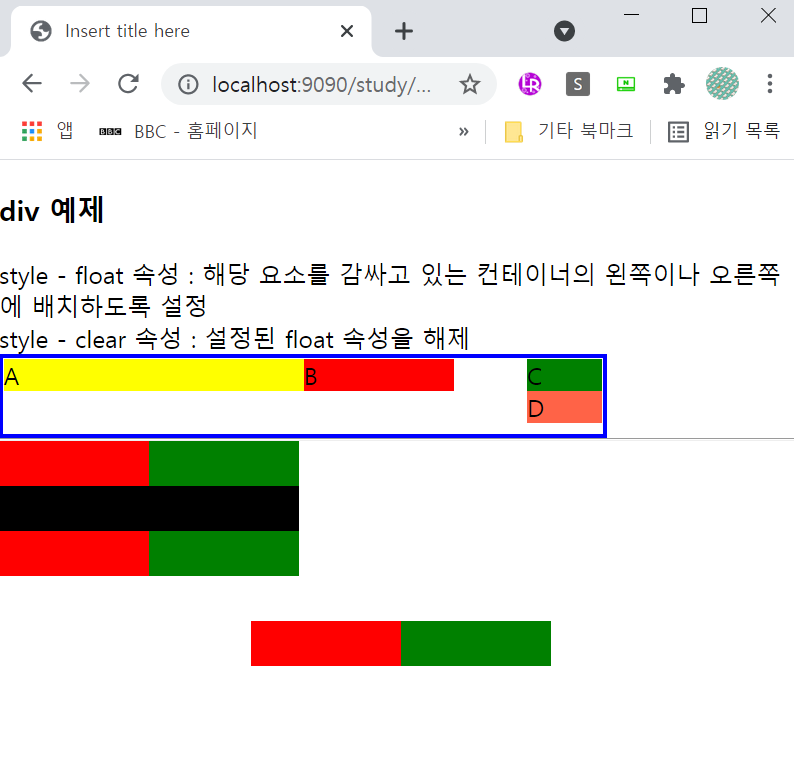
| 0913_HTML : 레이아웃 관련 태그(2) div 태그 (0) | 2021.09.14 |
| 0913_HTML : 레이아웃 관련 태그 (1) (1) | 2021.09.14 |
| 0913_HTML : 기본 태그(5) formatting 관련 태그 (0) | 2021.09.14 |