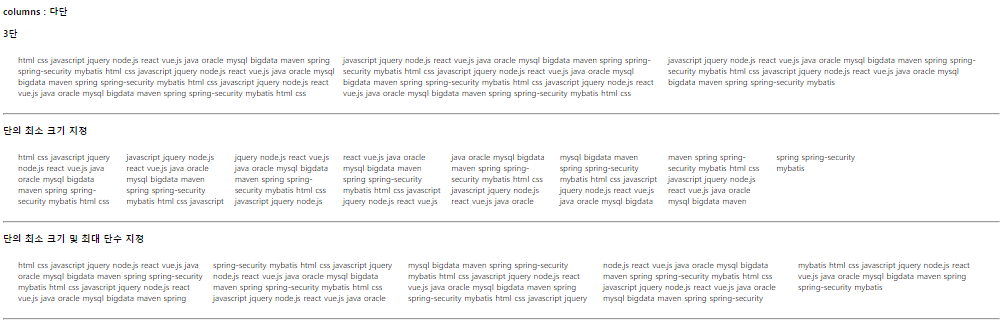
columns 속성
- 요소의 다단 레이아웃 열수 및 열 너비를 설정
더보기
<!DOCTYPE html>
<html>
<head>
<meta charset="UTF-8">
<title>Insert title here</title>
<style type="text/css">
.box1 {
	columns: 3; /* 단 */
	margin: 30px;
}

.box2 {
	columns: 200px; /* 단의 최소 크기 */
	margin: 30px;
}

.box3 {
	columns: 200px 5; /* 단의 최소 크기 및 단의 최대 개수 */
	margin: 30px;
}

</style>


</head>
<body>

<h3>columns : 다단</h3>

<h3>3단</h3>
<div class="box1">
	html css javascript jquery node.js react vue.js java oracle mysql bigdata maven spring spring-security mybatis
	html css javascript jquery node.js react vue.js java oracle mysql bigdata maven spring spring-security mybatis
	html css javascript jquery node.js react vue.js java oracle mysql bigdata maven spring spring-security mybatis
	html css javascript jquery node.js react vue.js java oracle mysql bigdata maven spring spring-security mybatis
	html css javascript jquery node.js react vue.js java oracle mysql bigdata maven spring spring-security mybatis
	html css javascript jquery node.js react vue.js java oracle mysql bigdata maven spring spring-security mybatis
	html css javascript jquery node.js react vue.js java oracle mysql bigdata maven spring spring-security mybatis
	html css javascript jquery node.js react vue.js java oracle mysql bigdata maven spring spring-security mybatis
</div>
<hr>

<h3>단의 최소 크기 지정</h3>
<div class="box2">
	html css javascript jquery node.js react vue.js java oracle mysql bigdata maven spring spring-security mybatis
	html css javascript jquery node.js react vue.js java oracle mysql bigdata maven spring spring-security mybatis
	html css javascript jquery node.js react vue.js java oracle mysql bigdata maven spring spring-security mybatis
	html css javascript jquery node.js react vue.js java oracle mysql bigdata maven spring spring-security mybatis
	html css javascript jquery node.js react vue.js java oracle mysql bigdata maven spring spring-security mybatis
	html css javascript jquery node.js react vue.js java oracle mysql bigdata maven spring spring-security mybatis
	html css javascript jquery node.js react vue.js java oracle mysql bigdata maven spring spring-security mybatis
	html css javascript jquery node.js react vue.js java oracle mysql bigdata maven spring spring-security mybatis
</div>
<hr>

<h3>단의 최소 크기 및 최대 단수 지정</h3>
<div class="box3">
	html css javascript jquery node.js react vue.js java oracle mysql bigdata maven spring spring-security mybatis
	html css javascript jquery node.js react vue.js java oracle mysql bigdata maven spring spring-security mybatis
	html css javascript jquery node.js react vue.js java oracle mysql bigdata maven spring spring-security mybatis
	html css javascript jquery node.js react vue.js java oracle mysql bigdata maven spring spring-security mybatis
	html css javascript jquery node.js react vue.js java oracle mysql bigdata maven spring spring-security mybatis
	html css javascript jquery node.js react vue.js java oracle mysql bigdata maven spring spring-security mybatis
	html css javascript jquery node.js react vue.js java oracle mysql bigdata maven spring spring-security mybatis
	html css javascript jquery node.js react vue.js java oracle mysql bigdata maven spring spring-security mybatis
</div>
<hr>

</body>
</html>
'쌍용강북교육센터 > 9월' 카테고리의 다른 글
| 0923_CSS : display:flex를 사용하지 않고 메뉴 상단 고정 (0) | 2021.09.23 |
|---|---|
| 0923_CSS : flex 속성 (0) | 2021.09.23 |
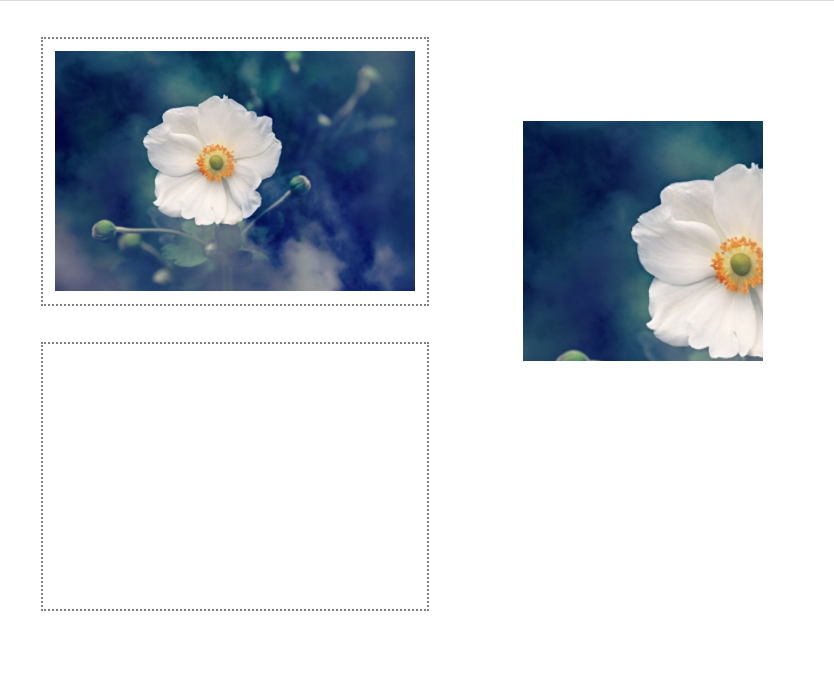
| 0923_CSS : clip (0) | 2021.09.23 |
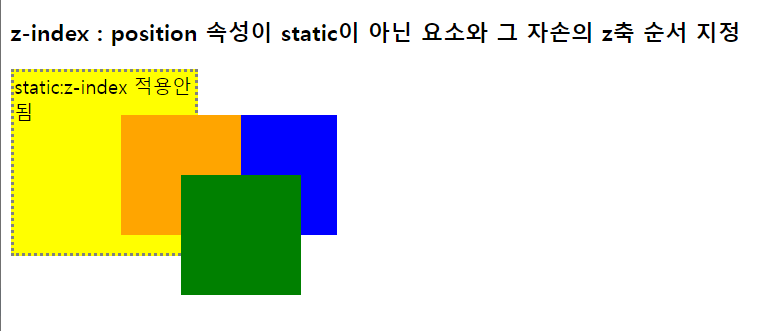
| 0923_CSS : Z-index (0) | 2021.09.23 |
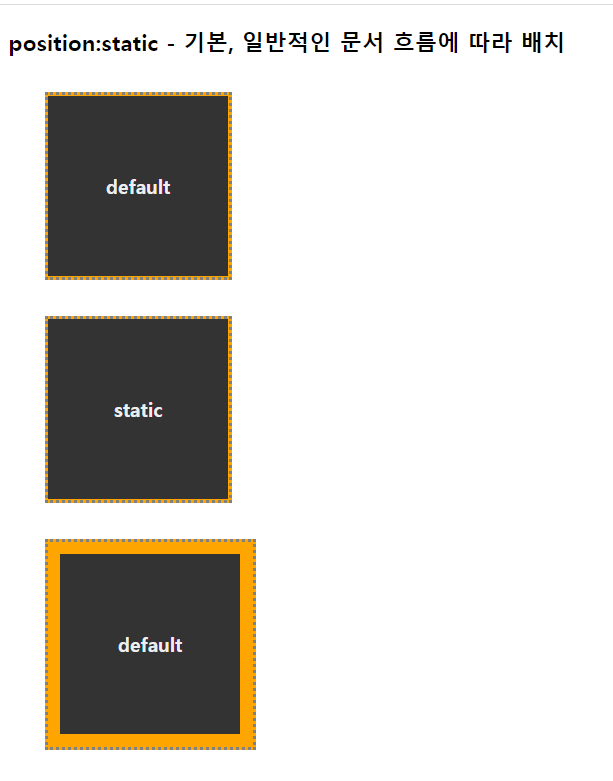
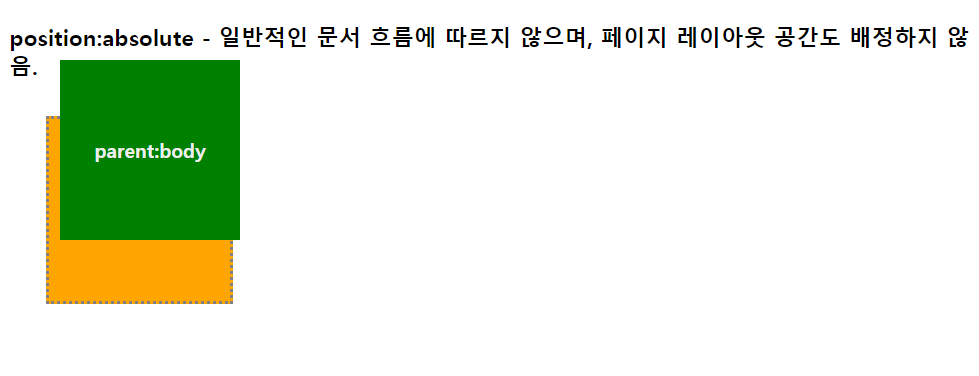
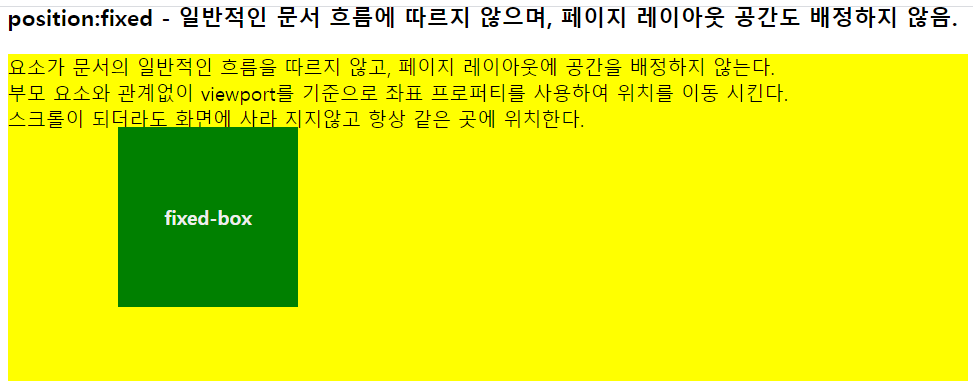
| 0923_CSS : 포지셔닝 position (0) | 2021.09.23 |